|


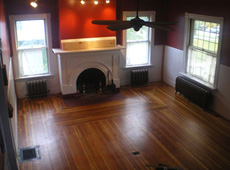
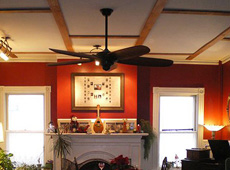
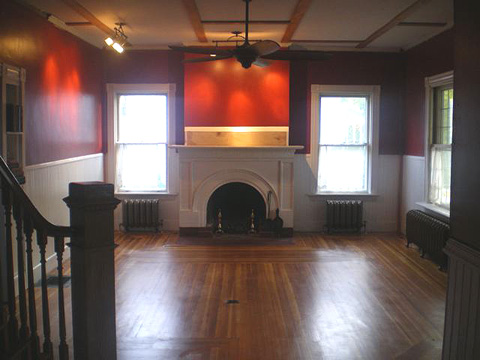
This is the living room after all the work was done
This is our crowning achievement on this house. And it's not like we even had to do anything,
all we had to do was to UNDO everything that had been done in the last 50 years! I'm so glad
we took a picture of the living room when we were looking to buy the place, otherwise we
wouldn't have this record. Pictures are worth a thousand words. And for the record, my
Grandmother liked it as it was, more "modern".
Check out the before pic below...
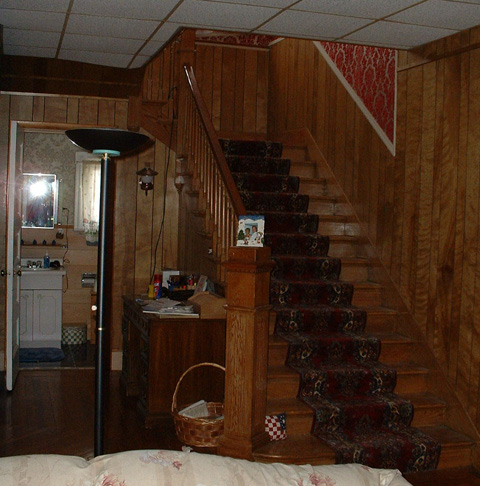
|
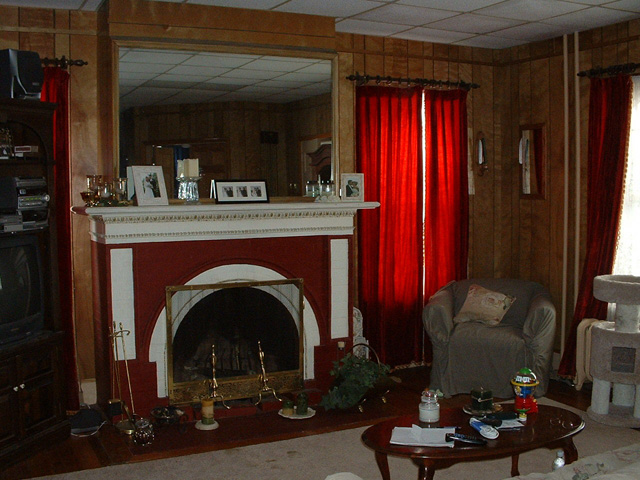
A before shot of the living room
|
So this is what we saw. The ceiling had been lowered 1.5 feet with an acoustical tiled
basement ceiling complete with florescent lights. The plaster walls and wainscoting were
covered up by "Antique Maple" wood paneling and thick, red velvet curtains hung in every
window. I imagined a massage parlor had once been in operation here.
|
|
The wainscoting going up the stairs was even covered up! Get a load of that red flocked wallpaper
going up the stairs. Best little whorehouse in St. Albans! It looked more like someone's basement
family room than a Queen Anne living room.
|
This was such a large project that we decided to put this page into 3 stages.
Click below for pictures and
info
|
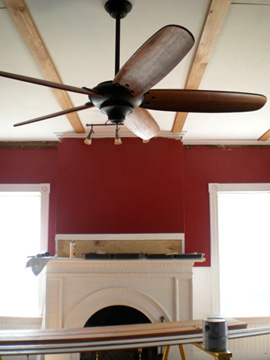
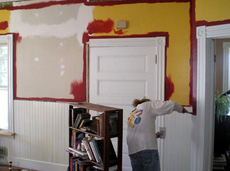
Starting to get that ceiling done. I hate taping and mudding so we decided to go for a ceiling
style that we found in another room, strapping for each seam. This means that instead of laying
out the sheetrock all straight in a row, each piece started halfway up from the piece before. I
don't know how many times I had to sketch this out to get it the way I wanted it. The mantel isn't
centered in the room and I had to decide to either line the ceiling up with the mantel or evenly
across the room. I decided on even. Took a long time to pick out some decent boards for the
ceiling at Home Depot.
Check out the ceiling story here.
|
|
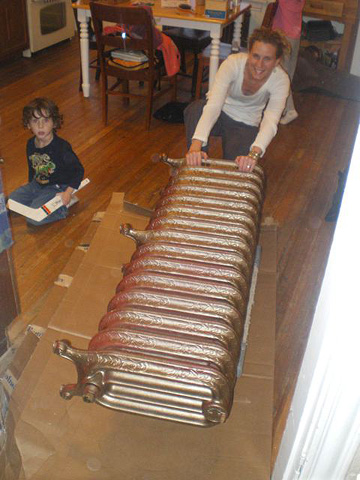
After the floor was finished and dried for a couple of days (now everything tasted like polyurethane),
it was time to move in the radiators. I wish I had put this one on a scale before we moved it in.
I was so worried about the floor we used layers of cardboard and wood paneling to protect the new
finish. We got it in much nicer and easier than it was taken out (and with less gouging).
|
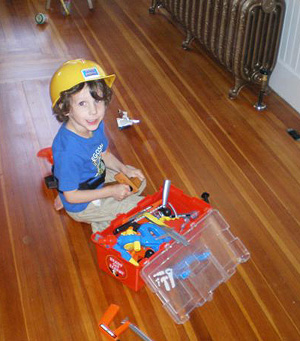
Eamon was a BIG help!
All it needs is some furniture and some cool old family photos and we're good to go!
|
And so here it is, voila! We put up a new ceiling, track lighting and a ceiling fan, new window
molding and sills, repaired and repainted the walls and wainscoting, patched and refinished the
floor and I think when all was said and done it ended up costing around $1,300 including getting
the radiators stripped which was the only part we didn't do ourselves.
|
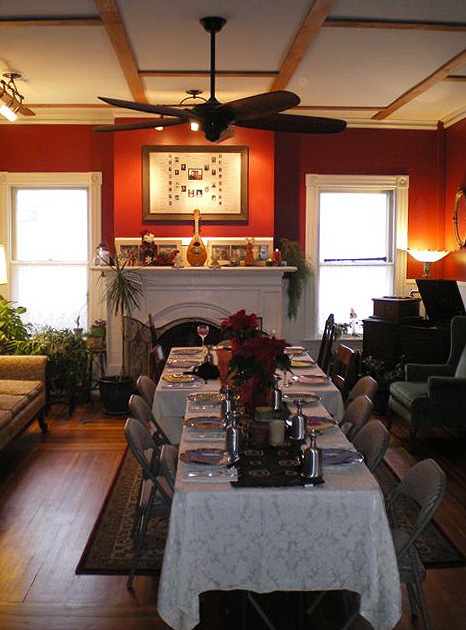
That's better. Thanksgiving.


|
|